Publish into WordPress, Ghost, Webflow or Shopify
On this page
- How publishing into a platform works
- Connect a platform
- 1. Open the section's Publishing settings
- 2. Pick your platform
- 3. Enter the credentials
- 4. Save, then test the connection
- What each platform needs
- WordPress
- Ghost
- Webflow
- Shopify
- If the test fails
- What Quillly sends
- What happens after you publish
- Common questions
- Do I still need a reverse proxy?
- Can my docs stay on Quillly while my blog publishes into WordPress?
- What happens to edits I make on WordPress?
- Related
A section in Quillly can publish into the WordPress, Ghost, Webflow or Shopify site you already run, instead of Quillly serving it. This page covers the credentials each platform needs, what Quillly sends, and what happens when you update, unpublish or delete an item.
Before you start, you need:
A section in Quillly, such as Blog. See Content types and URLs.
Admin access to your platform, to create the password, key or token that Quillly signs in with.
To send items to your own code instead of one of these platforms, use a webhook.
How publishing into a platform works#
You keep writing, scoring and scheduling in Quillly. When an item in the section is published, Quillly creates the post on your platform through the platform's API, and saves the post's address when the platform returns one. Your platform then serves the post on your site, so the section needs no reverse proxy rule.
The setting belongs to one section. Your blog can publish into WordPress while your docs stay on Quillly.
Connect a platform#
Open the section's Publishing settings#
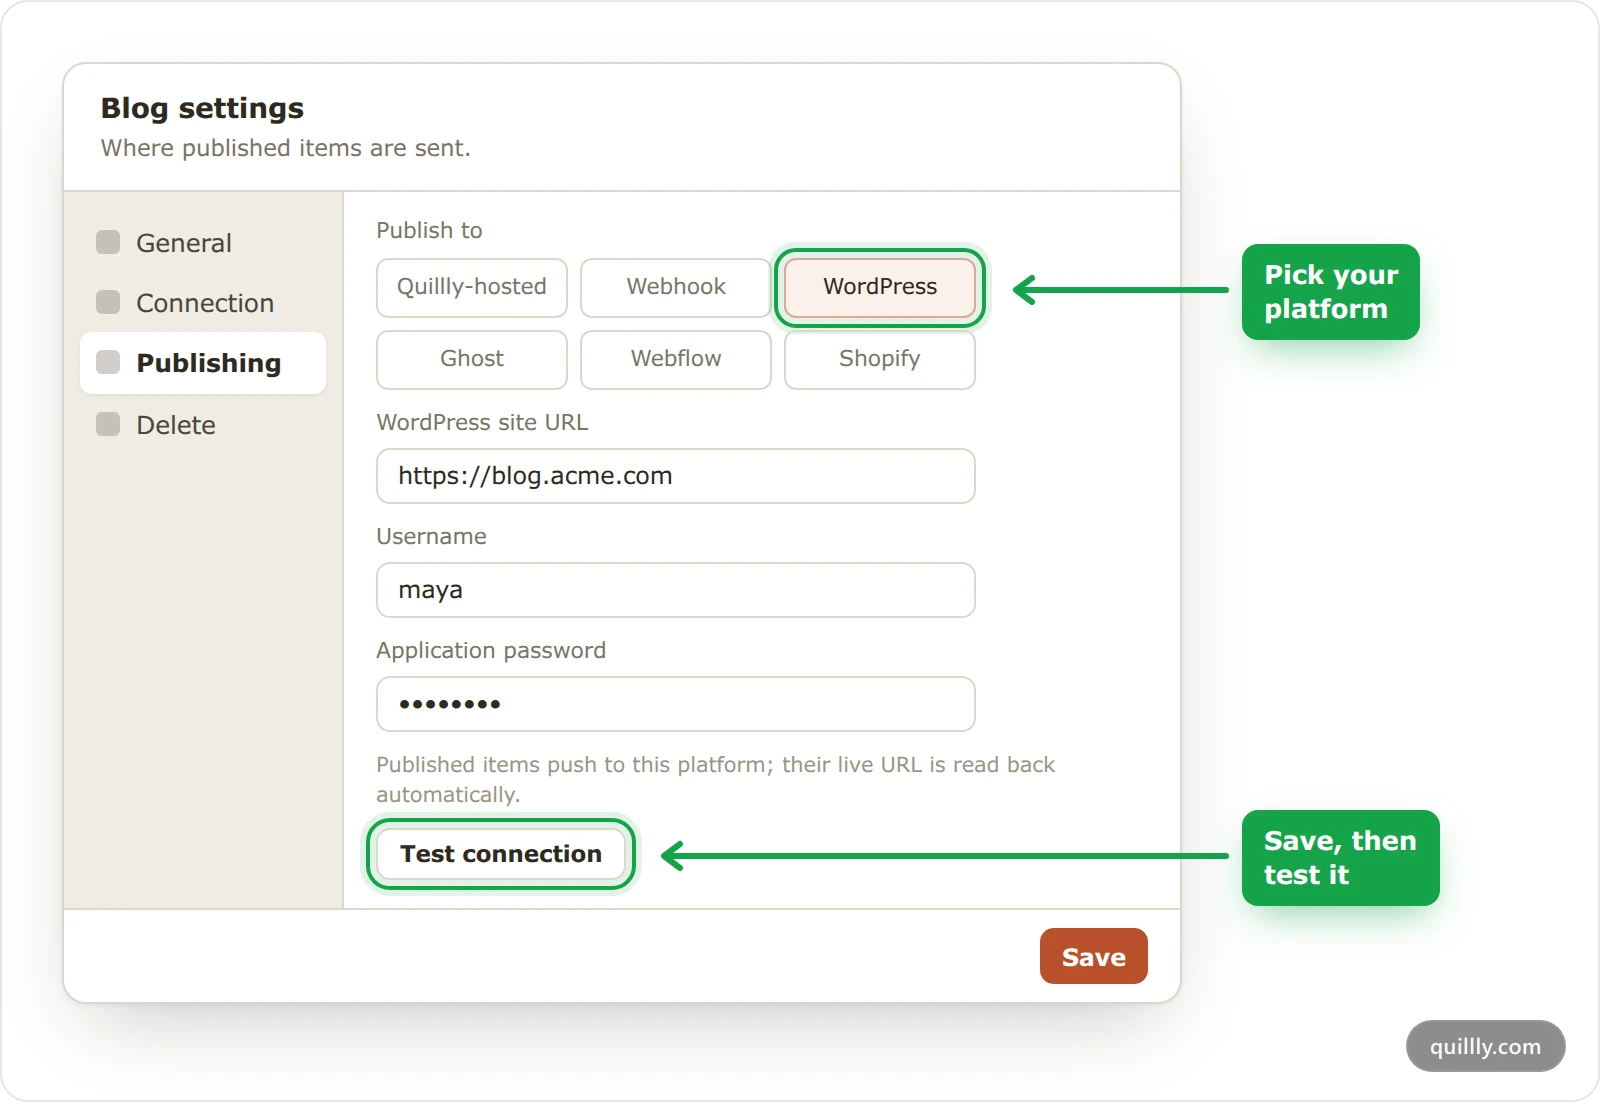
Under Content, open the section, such as Blog. Click the gear icon at the top of the section, then Publishing.
Pick your platform#
Under Publish to, click WordPress, Ghost, Webflow or Shopify. Quillly-hosted, the default, means Quillly serves the section itself.
Enter the credentials#
Fill in the fields for your platform. The next section says where to find each value.
Save, then test the connection#
Click Save. Open the gear icon again, go to Publishing, and click Test connection. Quillly reads from your platform without changing anything, and the message names what it reached, such as Connected as Maya on WordPress.
If you picked Your existing platform when you added the website, the Connect your platform screen already did this for your Blog, with WordPress, Ghost or a webhook.
What each platform needs#
WordPress#
Field | What to enter |
|---|---|
WordPress site URL | Your site's address, such as |
Username | The WordPress user that Quillly publishes as. It must be allowed to publish posts. |
Application password | A password you create in WordPress under Users → Profile → Application Passwords. Spaces in it don't matter. |
Application passwords are built into WordPress 5.6 and later, and they work through your site's REST API at /wp-json. The WordPress guide to application passwords explains them. If the user can't publish, Test connection says so.
Ghost#
Field | What to enter |
|---|---|
Ghost site URL | Your Ghost site's address, such as |
Admin API key (id:secret) | The Admin API key of a custom integration that you add in your Ghost settings. It has the form |
Quillly signs each request with that key, as the Ghost Admin API requires.
Webflow#
Field | What to enter |
|---|---|
Site API token (CMS read/write) | A site API token with CMS read and write access, created in your site settings under Apps & integrations. |
Collection ID | The ID of the CMS collection to write into, such as |
Body field slug | The rich-text field for the body. Leave it empty to use |
Summary field slug (optional) | A text field for the excerpt, such as |
Public base URL (optional) | Where the collection's pages live, such as |
The Webflow Data API doesn't return a page's address, so Quillly builds it from Public base URL and the slug. Fill it in, or Quillly has no address for your Webflow posts.
Shopify#
Field | What to enter |
|---|---|
Store | The |
Admin API access token | The token of a custom app in your Shopify admin with the |
Blog ID | The number of the Shopify blog to publish into, such as |
Storefront URL (optional) | Your store's public address, such as |
Posts arrive as blog articles, at /blogs/{blog}/{slug} on your storefront.
Note
Quillly doesn't show a saved WordPress application password or Ghost Admin API key again. If you later save any other change in this section's settings, enter the password or key again first, or Quillly clears it.
If the test fails#
The message says which platform answered and how. The most common ones:
Message | What to do |
|---|---|
… are required | A required field is empty. Fill it in, save, and test again. |
WordPress HTTP 401 — check the site URL, username and application password | WordPress refused the sign-in. Check the username, and create a new application password. |
Connected as Maya, but this user cannot publish posts | The user's role can't publish. Use an Author, Editor or Administrator. |
Ghost HTTP 401 — check the site URL and Admin API key | Copy the whole Admin API key again, both halves of |
Webflow HTTP 404 or Shopify HTTP 404 | The Collection ID or Blog ID doesn't exist for that token. Check the ID and the site or store. |
What Quillly sends#
Every platform gets the item's title, its slug and its body as HTML, the way Quillly renders it. Images in the body load from Quillly. The other fields depend on the platform:
Platform | Excerpt | Featured image | Tags | Status |
|---|---|---|---|---|
WordPress | Yes | No | No | Published or draft |
Ghost | No | No | No | Published or draft |
Webflow | Into the summary field, if you set one | No | No | Live item or draft |
Shopify | Yes, as the summary | Yes | Your target keywords | Visible or hidden |
The SEO title and meta description stay in Quillly. If your platform needs them, set them there.
What happens after you publish#
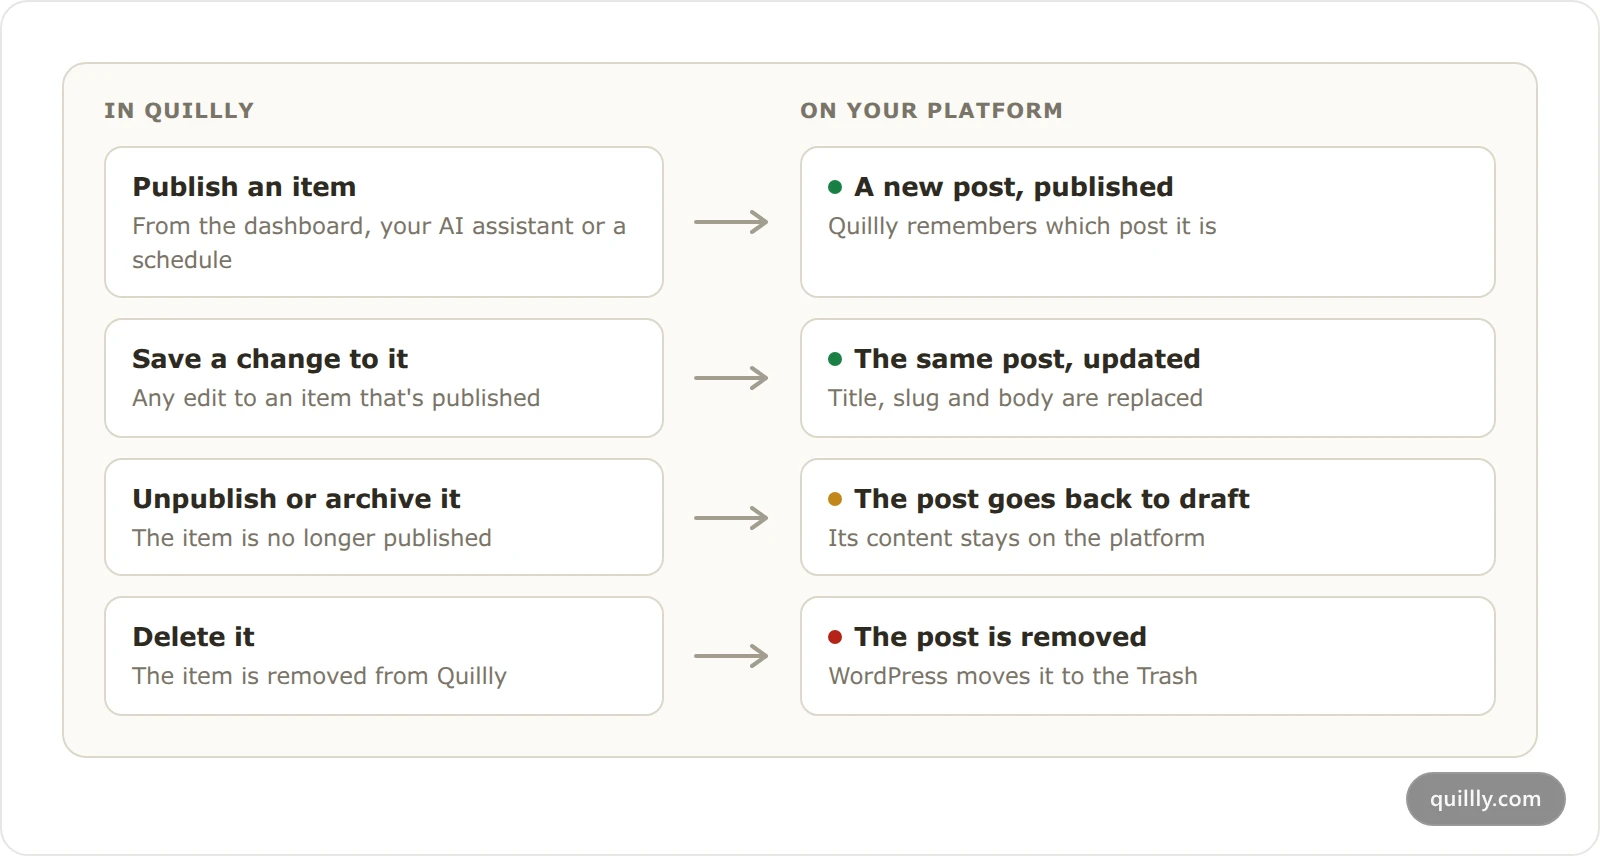
Each change you save to a published item updates the same post. The update replaces the title, slug, body and the other fields above, so make those changes in Quillly rather than on the platform.
Unpublishing or archiving an item sets the post back to draft on the platform. Its content stays there.
Deleting an item removes the post. WordPress moves it to the Trash, while Ghost, Webflow and Shopify delete it.
Items published before you connected the platform are sent the next time you save a change to them.
Switching to another platform doesn't move posts that were already sent, and later changes to those items don't reach the new platform.
Warning
Quillly sends each change once. If your platform is down or refuses the request, the item stays published in Quillly, nothing is retried, and the dashboard shows no error. The next change you save sends it again. Run Test connection whenever you change a password, key or token.
Common questions#
Do I still need a reverse proxy?#
No. Your platform serves the posts on your site, so a section that publishes into it needs no proxy rule.
Can my docs stay on Quillly while my blog publishes into WordPress?#
Yes. Each section has its own Publishing setting, so you choose a platform for each one.
What happens to edits I make on WordPress?#
They stay until you next change the item in Quillly. That update replaces the title, slug, body and excerpt with the version in Quillly.
Related#
Content types and URLs: the five content types and where each one lives.
Add a website: the three ways to set up a site, including your existing platform.
Serve on your own domain: the alternative, where Quillly serves the section on your domain.
Webhook publishing: send each item to your own code as JSON.
Import existing posts: move your posts into Quillly instead of publishing into the old platform.