Add a website
On this page
- Choose where your website lives
- Add a website
- 1. Start onboarding
- 2. Choose how to set up your site
- 3. Claim a subdomain or enter your domain
- 4. Finish setting it up
- Find your websites
- The website settings page
- Change or delete a website
- Common questions
- Can I change my website's domain later?
- Can a Quillly subdomain have docs and a changelog?
- Does an unfinished website count toward my plan?
- Related
Add a website to Quillly on a Quillly subdomain, on a domain you own, or on the platform you already publish with. This page covers all three, then the website settings page where you manage the site afterwards.
Before you start, have these ready:
A Quillly account. You sign in with Google.
For your own domain: the Google Search Console or Bing Webmaster Tools account where the domain is verified.
For an existing platform: an admin login to your WordPress or Ghost site, or a URL that can receive a webhook.
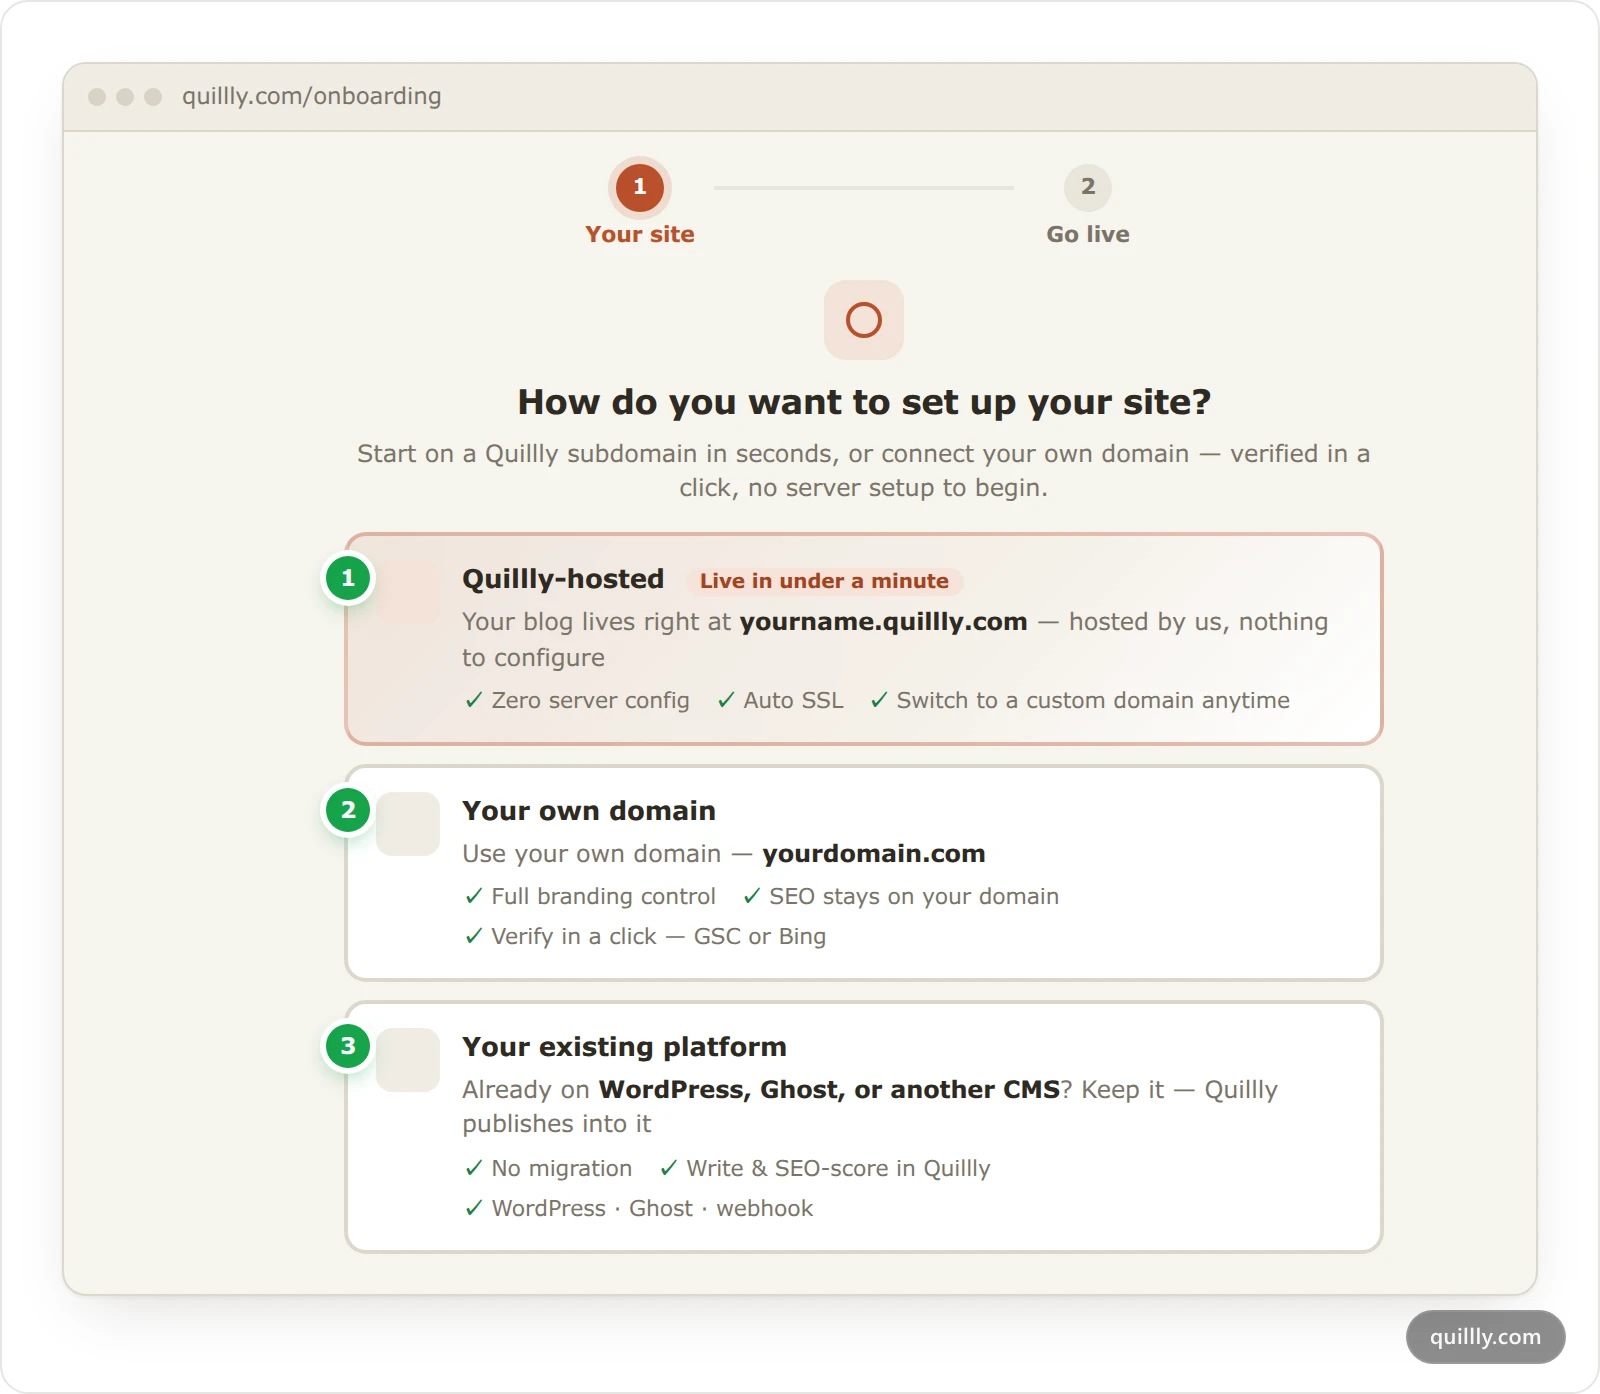
Choose where your website lives#
The three options on How do you want to set up your site? differ in where your pages are served and what you do next.
# | Option | Where your content appears | What you do next |
|---|---|---|---|
1 | Quillly-hosted |
| Pick a subdomain. The site goes live with a first post. |
2 | Your own domain |
| Prove you own the domain, then add a reverse proxy for each section Quillly serves. |
3 | Your existing platform | Your WordPress or Ghost site, or wherever your webhook stores posts. | Connect the platform. Quillly publishes into it. |
Quillly-hosted is the quickest way to a live page. You can move to your own domain later with a redirect, as the last section of this page shows.
Add a website#
Start onboarding#
Your first website is part of onboarding, which opens after you sign up. For every website after that, open Websites under Configure and click Add Website. Onboarding opens on the hosting choice.
Choose how to set up your site#
Click Quillly-hosted, Your own domain or Your existing platform.
Claim a subdomain or enter your domain#
Quillly-hosted: on Pick your blog URL, type a subdomain of 3 to 30 characters. Use lowercase letters, numbers and hyphens, with no hyphen at the start or end and no two in a row. A few names, such as
www,bloganddocs, are reserved. When the screen says the name is available, click Claim & go live.Your own domain or Your existing platform: on Add your website, type your domain, such as
acme.com, and click Continue. Aquillly.comaddress is refused here, so go back and pick Quillly-hosted for that.
If you type a domain you already added, Quillly shows Resume setup instead of adding it twice.
Finish setting it up#
What comes next depends on your choice:
Quillly-hosted: the site is live at once, with a first post already published. The screen reads Your blog is live.
Your own domain: the screen Verify you own acme.com asks you to connect Search Console or Bing.
Your existing platform: the screen Connect your platform asks for your WordPress, Ghost or webhook details.
Every path ends on the same screen. Under Make it even better you can connect Google Search Console, Bing Webmaster and your AI assistant. Go to your dashboard opens your Blog.
Note
If you're new to Quillly, adding your first website starts your 14-day trial. After that, your plan sets how many active websites you can have, and a site you haven't finished setting up doesn't count. See Plans, trial and limits.
Find your websites#
Websites lists the sites you own in two groups:
Active sites are set up and count toward your plan. A dot on each site's icon shows its state; hover over it to read the state, such as Live or Domain not verified.
Drafts are sites you haven't finished setting up. Click Continue Setup to pick up where you left off, or the bin icon to delete the draft.
Click an active site to open its website settings page. A site whose domain isn't verified yet opens its setup screen instead.
The website settings page#
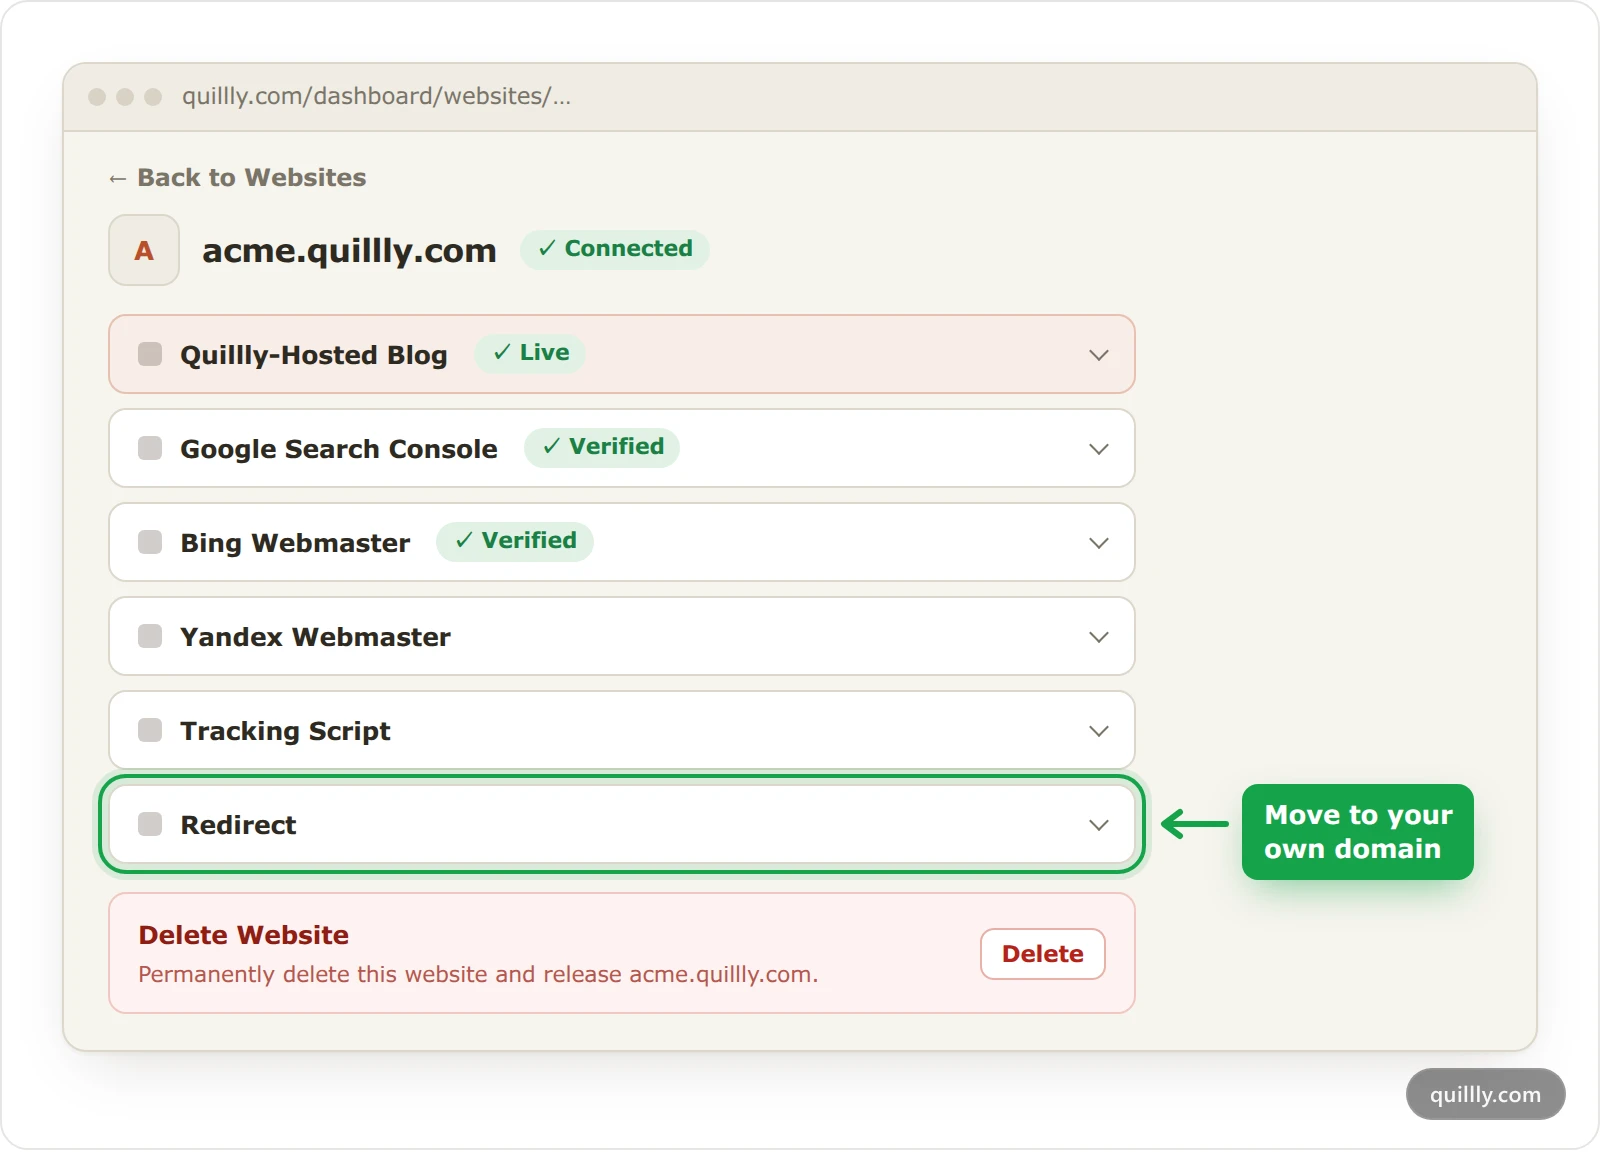
The website settings page shows the site's address at the top, with a Connected badge once it's set up. Below it, each section opens on a click:
Section | What it's for |
|---|---|
Quillly-Hosted Blog | Quillly subdomains only: the live address of your site. |
Reverse Proxy Setup | Your own domain only: the rules that serve Quillly's pages on your domain. |
Google Search Console, Bing Webmaster, Yandex Webmaster | Connect each search engine, verify the site and submit your sitemaps. |
Tracking Script | Add a third-party tag, such as Google Analytics, to the pages Quillly serves. |
Redirect | Send this website's visitors to another of your websites. |
Delete Website | Remove the website. It sits in the red box at the bottom. |
Content settings aren't on this page. Each content section, such as Blog or Docs, has its own settings behind the gear icon at the top of that section. Content types and URLs covers the sections a website can have.
Change or delete a website#
A website's domain can't be changed once the website exists. To move to a new domain, add the new domain as a second website. Then open the old site's Redirect section, choose the new site, and let Quillly move your posts and set up a permanent redirect.
To delete a website, click Delete under Delete Website. If the site is Quillly-hosted or has published posts, you type its domain to confirm, then click Delete forever.
Warning
Deleting a Quillly-hosted website releases its subdomain, and anyone can claim it after. If you're moving, use Redirect instead, so the subdomain keeps forwarding old links.
Common questions#
Can I change my website's domain later?#
No, the domain is fixed once the website exists. Add the new domain as another website, then use Redirect on the old one to move your posts and forward its visitors.
Can a Quillly subdomain have docs and a changelog?#
Yes. On a Quillly subdomain your posts sit at the root, and docs and changelog sections sit on paths such as /docs and /changelog. There's no proxy to set up.
Does an unfinished website count toward my plan?#
No. Only active websites count. A site stays in Drafts, free, until you finish its setup.
Related#
Getting started: onboarding from sign-in to your first post.
Plans, trial and limits: how many websites each plan allows.
What is Quillly: what runs on your domain and what runs on quillly.com.
Prove you own your domain: the verify step for a website on your own domain.
Serve on your own domain: the reverse proxy rule for each section.
Content types and URLs: the sections a website can have and where they live.